Application and Usage of Segment Anything
Introduction

We have talked about what makes Segment Anything (SAM) so powerful, the reasons behind it, and how to run it in the simplest way possible. Now let’s dive down on the usage of SAM. For your information, we will focus more on the SAM decoder part, since it is where we could do most of the customization in our detection process (list how many points for detection, how many point will be inferenced in each batch etc). We will start by listing all available important parameters that might affect the accuracy in our test. Then we will test the different parameters on the same image to see the effect and reasoning behind why do we need to change them. In summary, they are as the following:
a. Point Grids, Point per-Side, and Points per-Batch.
b. Predicted IoU Threshold, Stability Score Threshold, and Stability Score Offset.
Important Parameters Review in SAM
Point Grids (PG), Point per-Side (PpS), and Points per-Batch (PpB)
Let’s start by introducing point grids. Point grids (PG) are just list of coordinates in the image that is going to be used to do object detection. Let’s say that we define point grid for location (x, y) = (10, 20) to SAM. It means that we will try to detect possible object(s) in the location (x, y) = (10, 20) and its region. Then, we will got N mask/point result (SAMv1 -> N=3, N: whole, part, subpart; SEEM -> N=6; and SAMv2 -> N=4). From this, we will filter the N mask/point by thresholds that we will discuss later, then go another Non Maximum Suppression (NMS) filter to filter masks that go to the same point before returning the final result to us.
Point per-Side (PpS), as the name suggest, defines how many point_grids to be used in the image. To make things simple, point_per_side to point_grids conversion will be:
PG = PpS * PpS
In simple term, if you define PpS = 10, we will get 10x10 PG that will have H/10 and W/10 point region spaces between each point as shown in Fig. 1. Therefore, in case that you have smaller objects with dense scenario, use bigger PpS=48 or PpS=64, otherwise use smaller PpS.
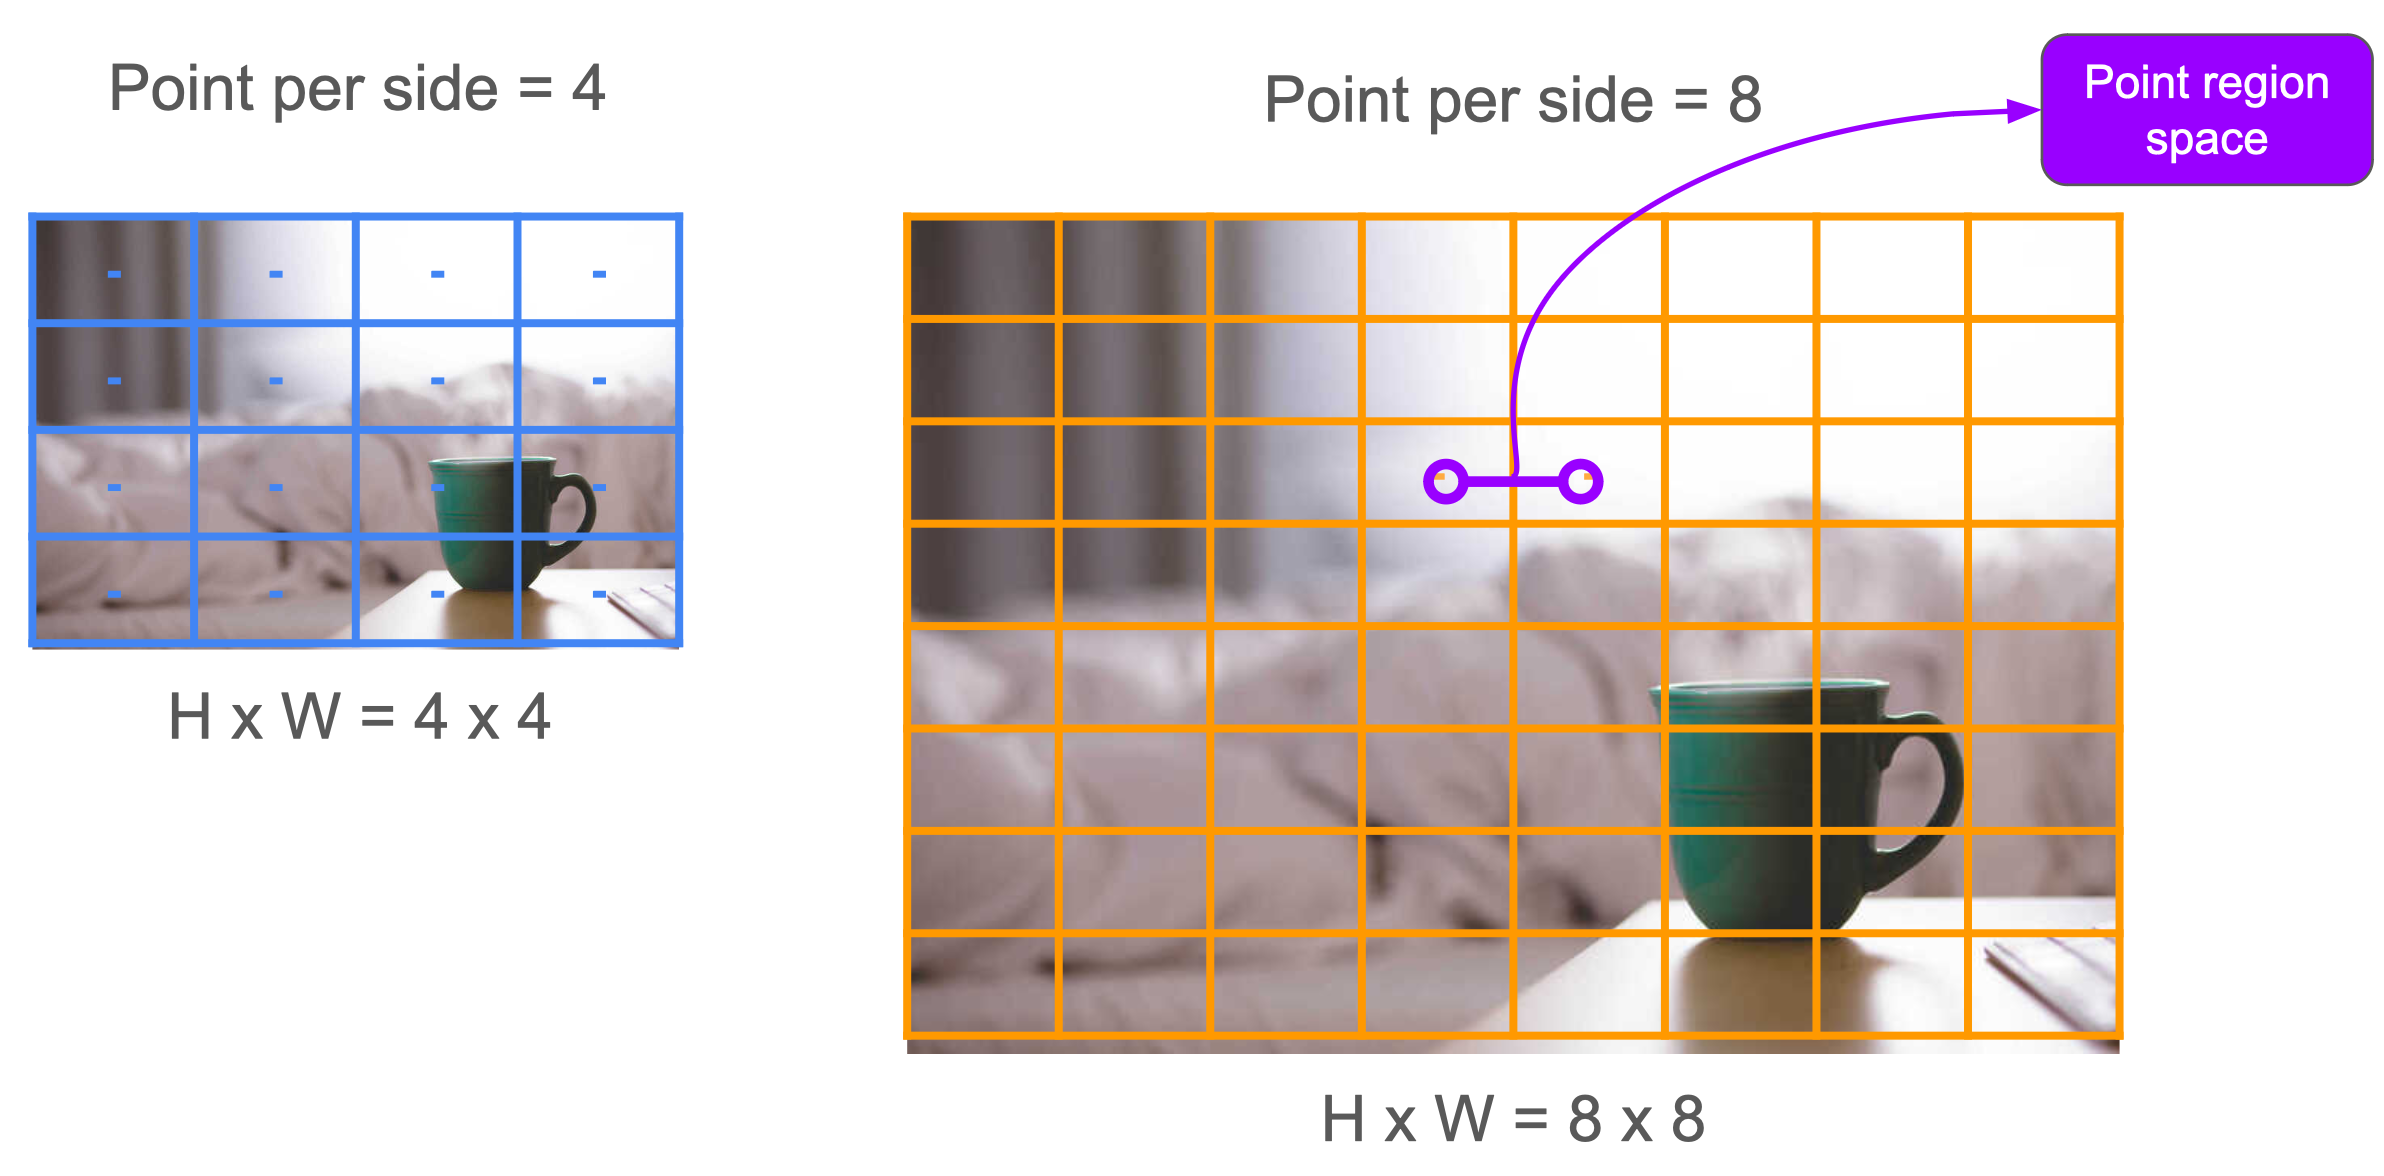
For Point per-Batch (PpB), it is basically defines on how much points will be processed in 1 batch. For example, let’s say that we have 10 x 10 point grids, which has 100 points in total. Then, if we define PpB=32, it means that we will calculate 32 points in each batch. In total, we will do 32->32->32->4 batch of SAM decoder.
Predicted IoU Threshold (PIoUT), Stability Score Threshold (SST), and Stability Score Offset (SSO)
Since SAM is trained with self-supervised learning in the final stage of its training, they have to make sure that the predicted masks are credible enough, hence why they set a very high PIoUT=0.88 as in this link and this link. While this is okay if we use the mightiest SAM/SAM-H, it is not possible to generalize it to other SAM variants (Mobile-SAM, Efficientvit-SAM, RepVIT-SAM etc). Hence, I recommend to set it to a lower values: ~0.6 for Mobile-SAM, ~0.7 for EfficientVIT- and Repvit-SAMs, and ~0.75 for SAM-L or SAM-B. The reasoning for that is to pass lower accuracy detections that could potentially be correct objects. Again, this will be your pick if you want to:
a. Detect/pass as many objects as possible.
b. You don’t really care about False Positive.
c. Avoid adding PpS, as it could double the inference time.
d. Use smaller SAM variants as mentioned above. \
If you want to try to correctly segment objects as much as possible, avoid this way, because it will introduce a lot of noises / False Positive in your results. I do suggest to use bigger PpS value, such as 40 or 64 for smaller objects + dense scenario, but beware that the inference time will take a hit due to more points to process.
Meanwhile, Stability Score Threshold (SST) and Stability Score Offset (SSO)’ usages are also similar, where it checks the masks’ accuracy. If the majority/all of the mask are > 0, the stability score will be very high or close to 1 and have higher values than SST filter as shown in this link and this link. For best results, I suggest to set SST at around 0.75-0.8 and to set SSO at around 0.85-0.9 to maximize detection results.
How to Maximize the Usage of SAM
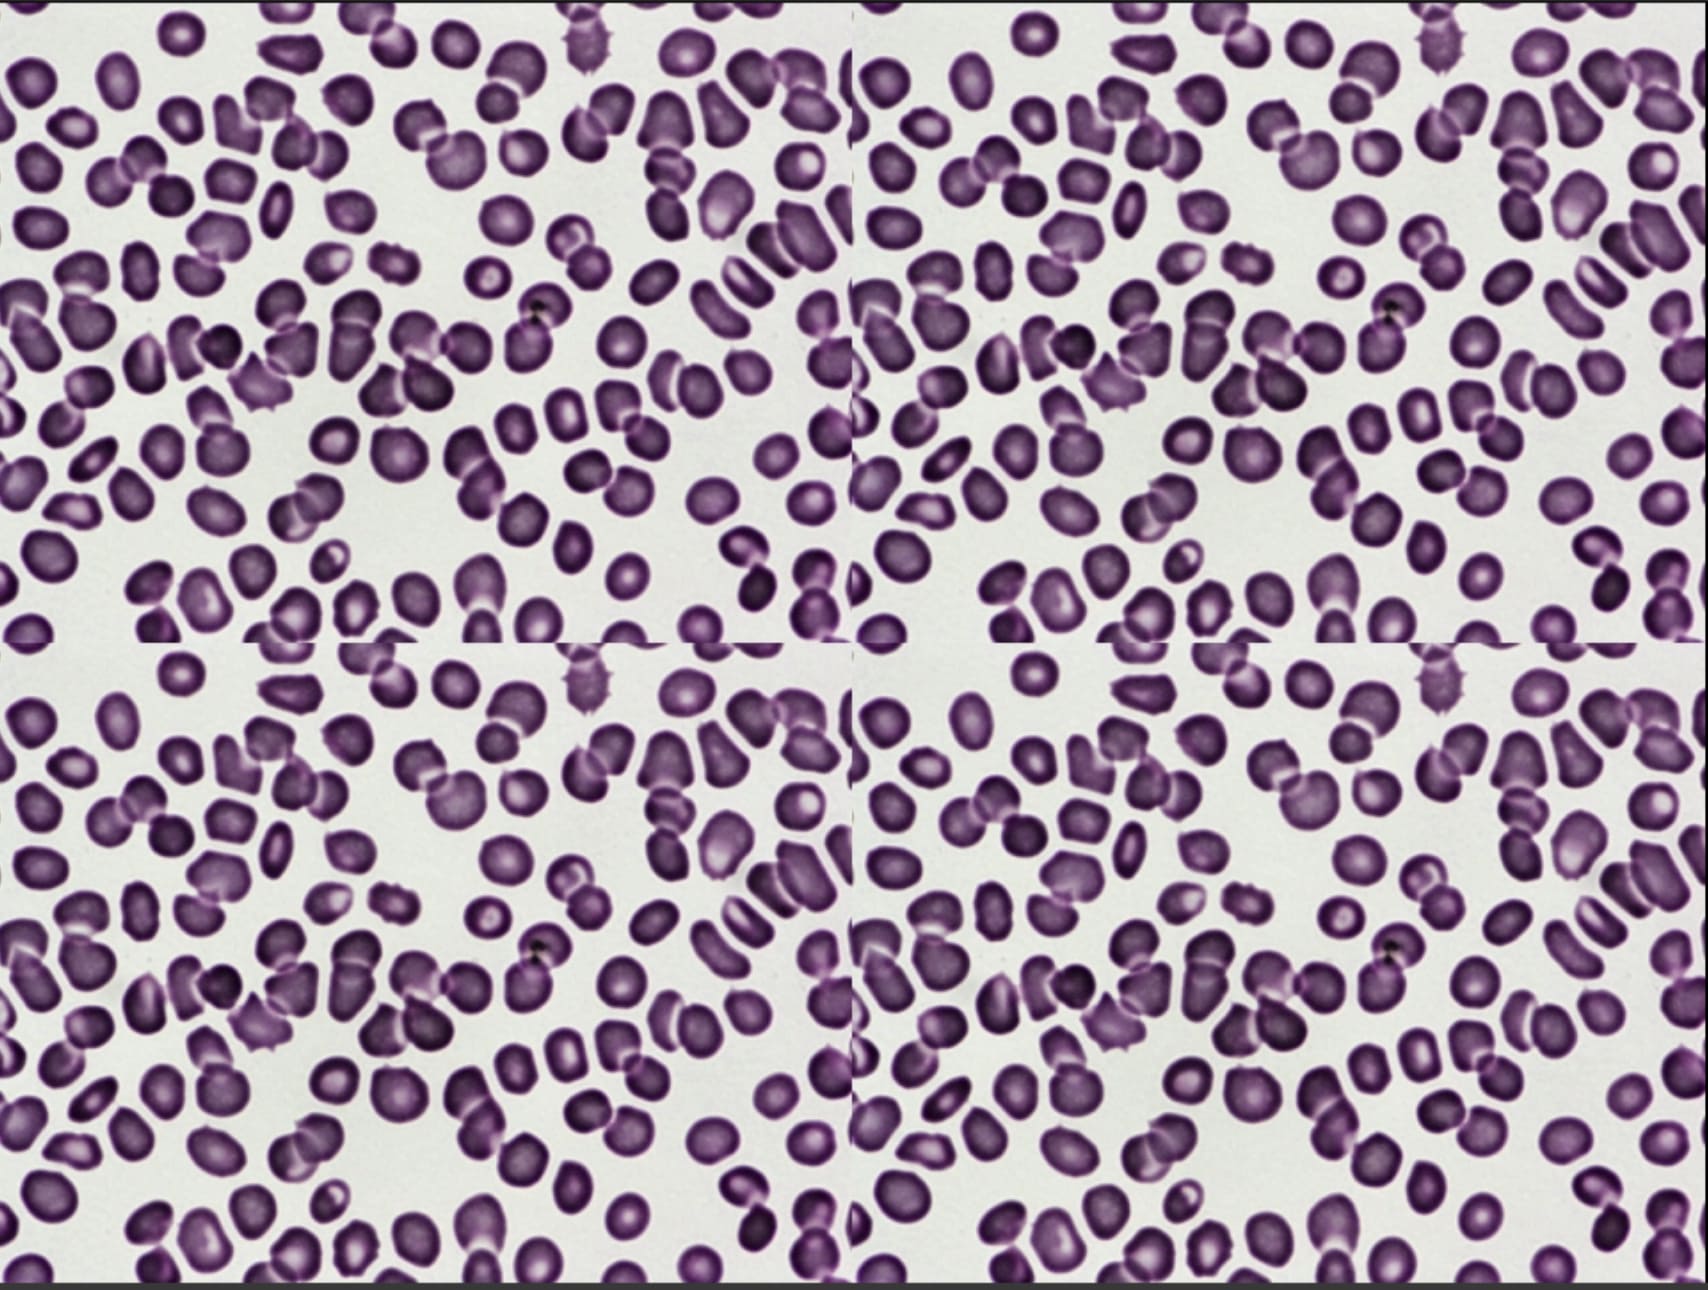
For our illustration, we will test cell image (hard one, dense + small objects) so that you can get a hold on which type of scenarios you are currently trying to tackle.
Case A. Small Objects + Dense Scenario
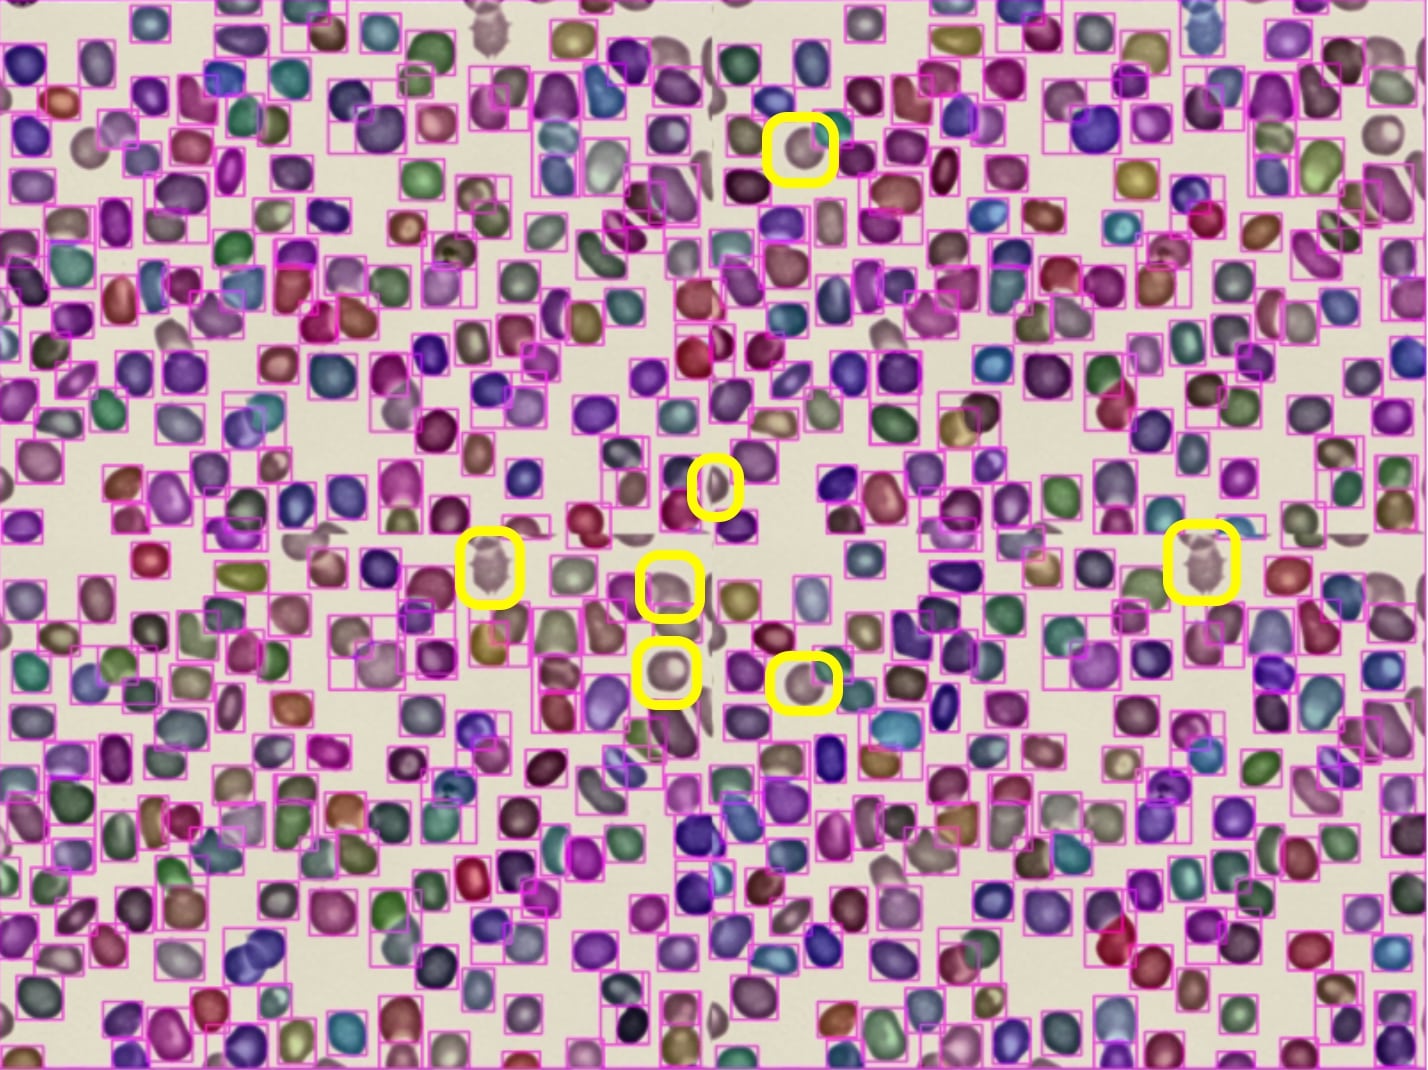
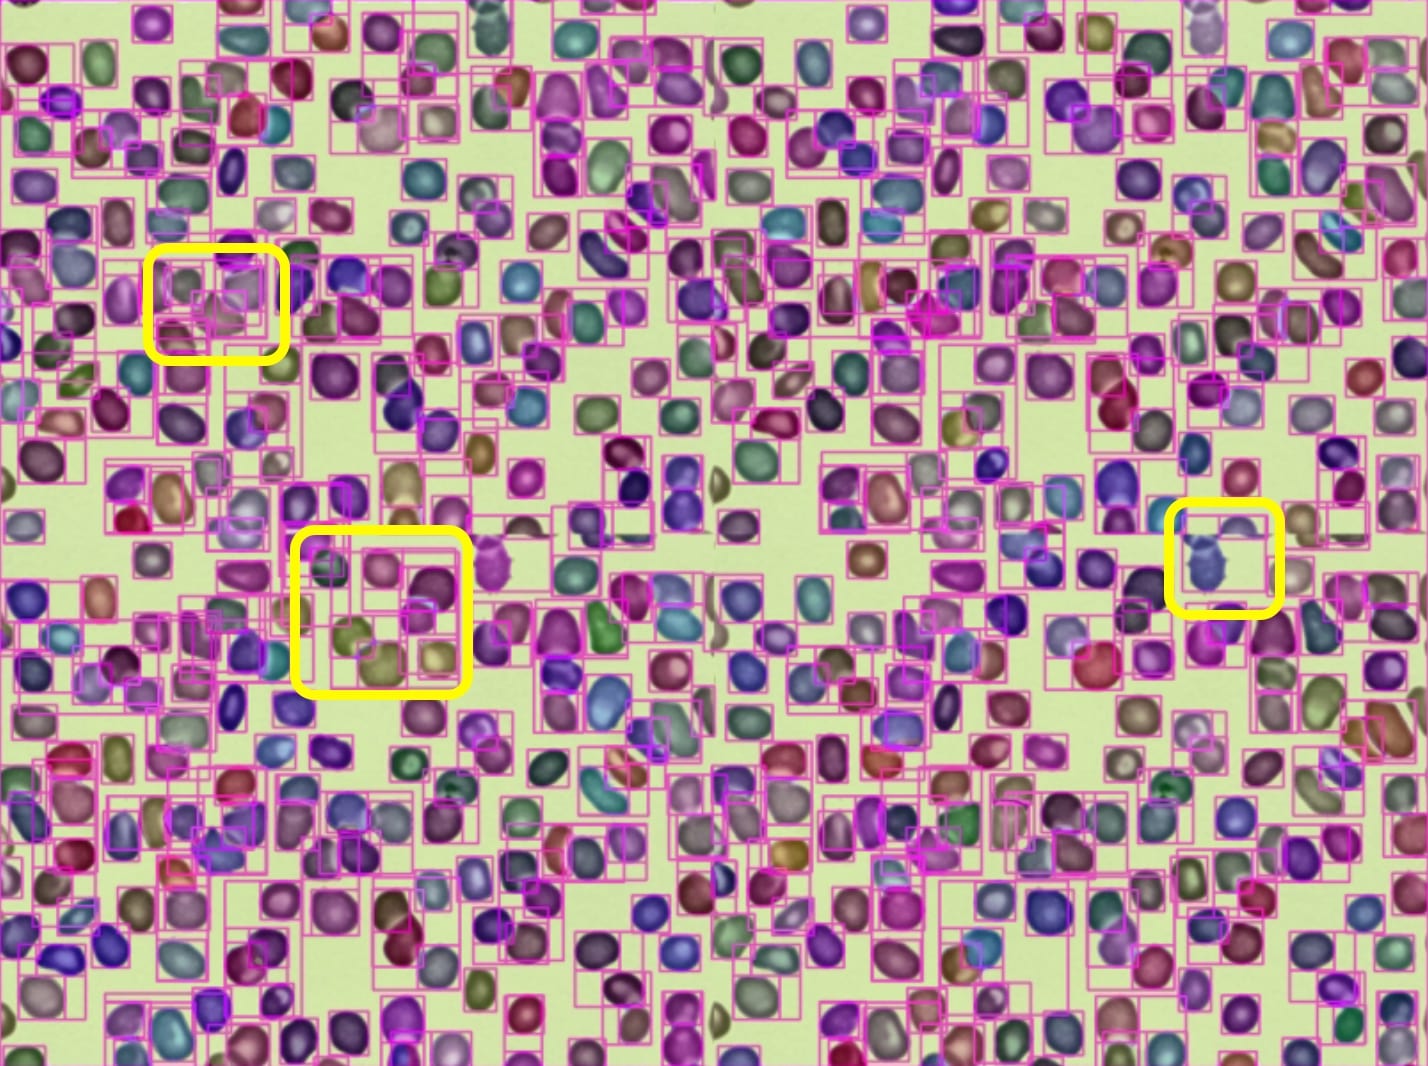
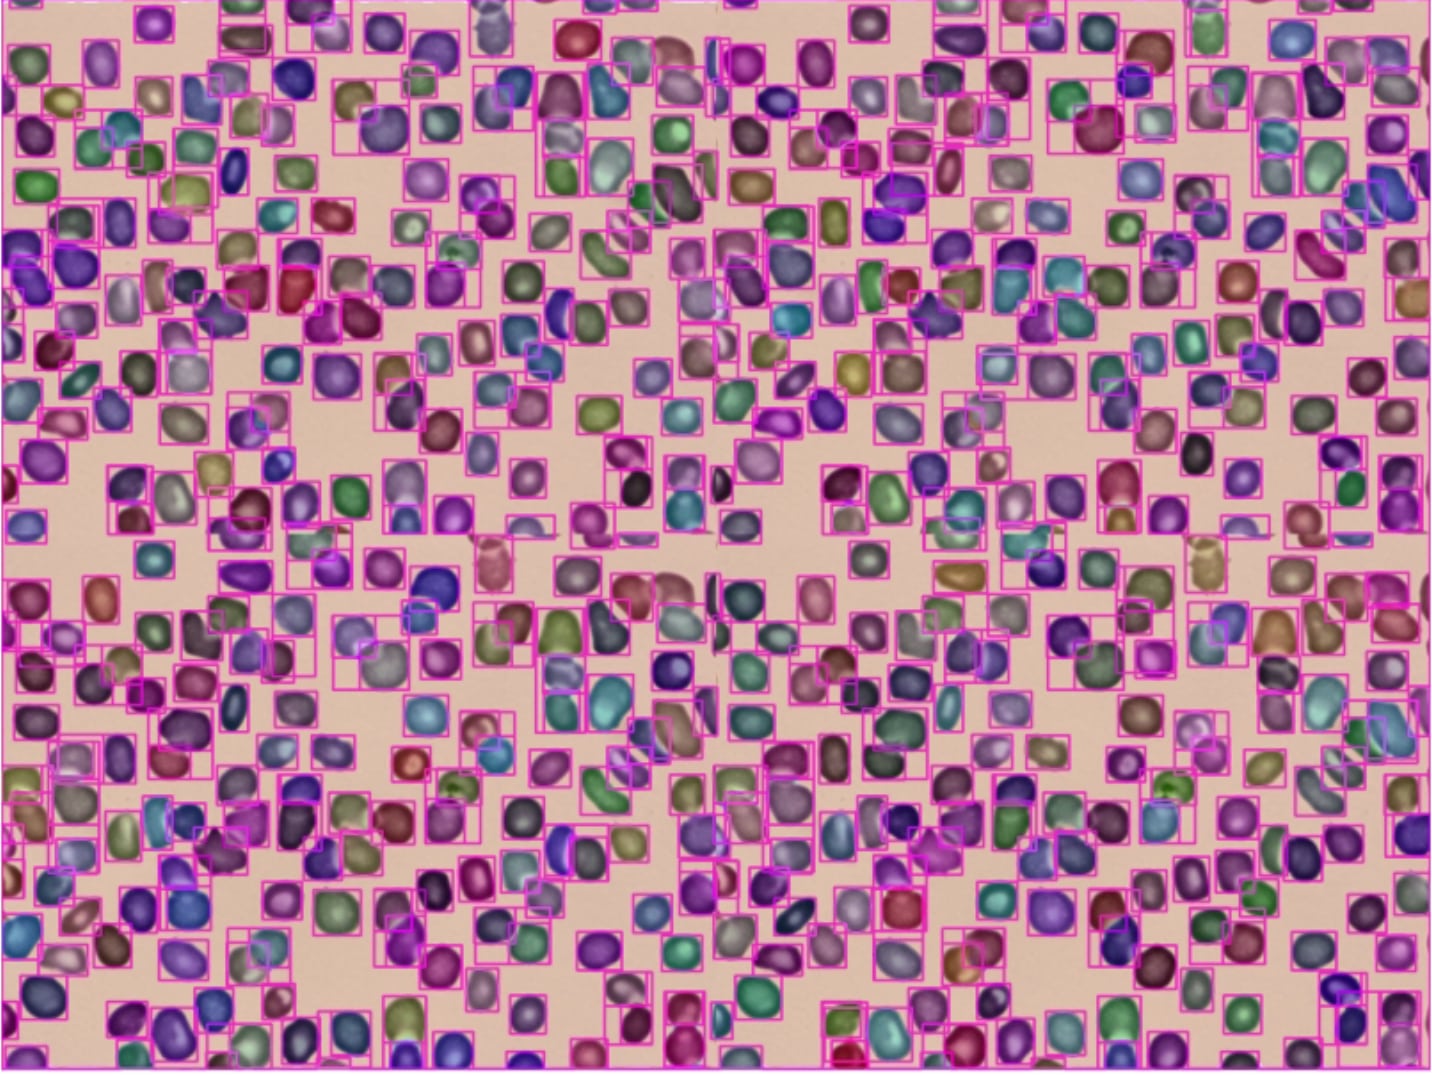
For this scenario, let’s say that your task is to detect small objects as much as possible. If we use the default setting, we will have this result which is quite nice already as shown in Fig. 2-left. However, there are still some undetected cells which has been partially marked in yellow-mark rectangles. If we use lower threshold as in Fig. 2-mid, it does detect more objects, at the expense of more False Positives as marked in yellow-mark rectangles. And if we use bigger PpS, we could detect majority of objects, but some cells are still missing even with higher PpS and slower inference results. Therefore, choosing slightly smaller-than-default threshold values (PIoUT, SSO, and SST) together with higher PpS should yield the best result for this scenario.
Case B. Small Objects + Sparse Scenario or Big Objects + Sparse/Dense Scenario
For this scenario, setting lower threshold or bigger PpS won’t help too much. Hence, I suggest to stick with default setting, but lowering your thresholds (PIoUT, SSO, and SST) by around 0.05 to 0.1 from the default values might help in increasing your detection results. For bigger objects, you can even use lower PpS (10 - 16) because there won’t be too much objects/spaces for those objects in the image.
Application of SAM in Various Fields
Well, so far, we only test it on medical dataset. Other than medical field, it could also be used for industrial, COCO objects, and much more. For illustration, Here are some COCO and Scene results.
Conclusion
From our use-case, experiments, and tests, we could tweak the important variables appropriately depending on the objects of interest. Hence, using SAM this way might yield you the best results:
a. Dense + small objects, use higher PpS + slightly below-default’s threshold.
b. For small + medium with medium number of objects, normally you don’t need to modify anything.
c. For bigger + sparse objects, reducing PpS should give you faster results with potentially less False Positives.
d. For b and c cases with odd behaviors (less detection/not detected at all), it might be caused by the model’s bias or cases where SAM is rarely trained on, hence you might need to lower the parameters mentioned above.
Reference
Segment Anything
Cell dataset
Hope you enjoy the post shared in here and see you in the next post~
Enjoy Reading This Article?
Here are some more articles you might like to read next: